

It’s STEAM month at Girl Scouts Badgerland!
Do you have a favorite STEAM subject, badge, or activity? If you don’t have a favorite yet, we have put together a list of easy, at-home STEAM inspired activities to try out.
Make Rain
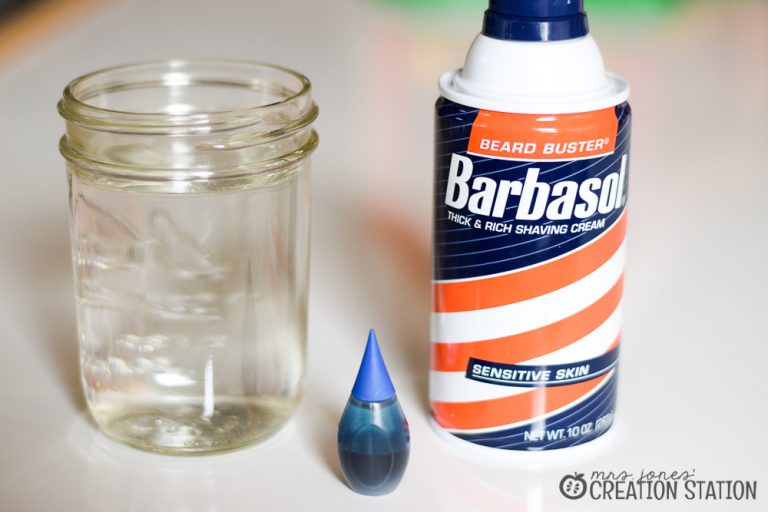
Materials: A clear jar, water, shaving cream and blue food coloring.
Be sure to make a prediction of what will happen before doing the experiment!
Experiment Procedure:
- Fill the cup with water (air)
- Add a thin layer of shaving cream (clouds – water vapor)
- Place drops of blue food coloring on the top of the shaving cream (water droplets)
- Wait for the “rain” to fall
- Make your conclusion – let us know how it goes!
For this experiment it is important to recognize that this activity shows how the water gets heavier on the top of the cloud and gravity makes it fall as rain. The shaving cream and food coloring represent the different forms of water we can easily see.
Make Rain Experiment via https://www.mrsjonescreationstation.com/simple-science-how-clouds-make-rain/
Watch a Rainbow Grow

Materials: Paper towel, water, washable markers and two cups.
Experiment Procedure:
- Fold a piece of paper towel in half (so you have 2 halves on top of each other). Trim the length to be 7.5 inches- any longer and the rainbow may not connect fully.
TIP: The shorter your piece of paper towel, the better it will connect. Also make sure you are using an absorbent paper towel. Recommended brand is Bounty.
2. Draw rectangles of the rainbow colors on each end. You want to make sure to fill these colors in well so there is enough dye to travel across the paper towel.
TIP: Add lots of marker to the ends, you want a good amount of dye to travel up the paper towel.
3. Place 2 cups with water filled 3/4 full. You only want the bottom of the paper towel in so leave some space from the top of the cup. Then place one end of the paper towel into each cup.
TIP: Do not place the ends too deep in the water or the dye may dissolve into the water instead of moving up the paper towel.
4. Leave the paper towel for 10-15 minutes and it will eventually connect the colors together.
This science experiment shows chromatography. Chromatography is a way of separating out a mixture of chemicals. If you ever got a paper with ink wet you would have seen the ink move across the page in streaks.
Capillary action makes the marker dye move up the paper towel. The water moves upward through the paper towel, lifting the washable dye molecules with it. Because the washable markers are water based, they disperse in water.
Set up a few different scenarios and hypotheses. For example, if you were to try this experiment without any dye, you would still see the water rising upwards towards the center of the paper towel.
If you were to try this experiment with permanent markers it would not work. This is because the markers are not water based (they are alcohol based) so the dye in the marker does not travel with the water. You can try this with permanent markers because the ink will disperse with rubbing alcohol but not with water.
Watch a Rainbow Grow experiment via https://www.thebestideasforkids.com/grow-a-rainbow-experiment/
Make a Pinhole Camera

Pinhole cameras are one of the earliest types of cameras, using the principle of “camera obscura” in which light travels through a small hole in a dark box to form a picture. This is the basis of the technology modern cameras use today! Follow these instructions to make your own pinhole camera.
Materials:
- Sharp pencil
- Empty shoe box with a lid
- X-Acto knife (Ask an adult for help with this item!)
- Scissors
- Ruler
- Wax paper
- Tape
- Blanket
Instructions:
- Use the point of a sharp pencil to punch a hole in one of the shorter ends of the shoe box.
- Ask an adult to use an X-Acto knife to cut a square in the opposite end of the box, directly across from the hole. The square should measure 2 inches on each side.
- Use scissors to cut a square of wax paper that measures 3 inches (7.62 centimeters) on each side.
- Place the wax paper directly over the square you cut in the box. Tape the edges of the wax paper to the box.
- Take the camera box to a dimly lit room and turn on a lamp. Stand about 5 feet from the lamp.
- Cover your head and pinhole camera with a blanket. Be sure that the end with the wax paper is facing you and the end with the pinhole is facing the lamp.
- Hold your pinhole camera at arm’s length from your face and aim it at the lamp. Keep it steady until you see an upside-down image of the lamp.
What’s Happening?
In a real camera, the lens is like the tiny hole you made in the box and creates a backward, upside-down image. Like the little hole, the lens lets in light. The wax paper is like film in a real camera, which has special chemicals on it. When the light hits the film, the chemicals start changing and turn the image into a photograph.
Via https://kids.nationalgeographic.com/explore/books/pinhole-camera/
Chromatography Butterflies

Chromatography is a laboratory technique for the separation of a mixture. Learn more about chromatography in this science experiment meets art project.
Materials:
- Non permanent markers (Over the years I’ve found Mr. Sketch markers work the best in this experiment.)
- White coffee filters
- Pencil
- Cups of water
- Black pipe cleaners
- String
- Scissors
Procedure:
- Choose one marker to experiment with first. (Hint~ black and brown are the most exciting!)
- Take one coffee filter. Put it on a newspaper or some kind of material to protect your table. Draw a thick circle around the center of the coffee filter where the ridged part meets the flat center. Use a pencil to write the color of the marker being used right in the center. (You’ll want to know what the original color was being used, and the pencil won’t smear and will remain intact after the experiment.)
- Fold the coffee filter in half and then in half again, resulting in a cone shape.
- Get a short glass of water. Pull apart the cone shaped coffee filter so it balances right on the glass with the tip of the cone just touching the water. (Be sure NOT to let the marker circle go in the water, just the uncolored tip of the coffee filter cone.)
- Let it sit and watch what happens as the water begins to flow up the paper.
- Repeat with different colored markers.
- After the water has reached the outer edge of the coffee filter, place it on a newspaper to dry.
- Once the coffee filters are dry you can observe the results.
Butterfly craft instructions:
- Cut your black pipe cleaners in half.
- Take one coffee filter and scrunch it up in the middle.
- Wrap a black pipe cleaner around the center.
- Shape the ends to form antennae.
- Tie a string to the center and hang!
Via https://buggyandbuddy.com/chromatography-butterflies-separating-colors-in-markers/
Make an Electromagnet

Materials:
- A large iron nail (about 3 inches)
- About 3 feet of THIN COATED copper wire
- A fresh D size battery
- Some paper clips or other small magnetic objects
Procedure:
- Leave about 8 inches of wire loose at one end and wrap most of the rest of the wire around the nail. Try not to overlap the wires.
- Cut the wire (if needed) so that there is about another 8 inches loose at the other end too.
- Now remove about an inch of the plastic coating from both ends of the wire and attach the one wire to one end of a battery and the other wire to the other end of the battery. See picture below. (It is best to tape the wires to the battery – be careful though, the wire could get very hot!)
- Now you have an ELECTROMAGNET! Put the point of the nail near a few paper clips and it should pick them up!
NOTE: Making an electromagnet uses up the battery somewhat quickly which is why the battery may get warm, so disconnect the wires when you are done exploring.
Continue the experiment at https://sciencebob.com/make-an-electromagnet/
Do you know another fun experiment or activity perfect for STEAM month? Leave a comment below!

You must be logged in to post a comment.